watercolor painting of seagull on wall above table

Many people choose to mount watercolors, artwork on textured paper, or time-worn documents, like old maps or handwritten letters, so that they’re suspended above an uncut mat board within a picture frame. This technique is called float mounting, and it creates a very professional and unique presentation that showcases the original nature of your piece when presented in a custom frame. The suspension of a float mount frame piece often casts dramatic shadows while also allowing artwork with raw or frayed edges to take center stage. Float mounting is especially ideal for watercolor paintings, which are created on heavyweight paper and will not be damaged by mounting from the backside of the art.

To have all your questions about float mounting artwork answered, from what float framing is to how to float-mount art like a pro, trust our 30+ years of framing knowledge to learn best practices.

Float Mounting 101: Tricks of the Trade

If you’re wondering how to secure a picture in a floating frame, follow our expert mounting and framing tips and tricks for how to float artwork in frame effortlessly.

  • You’ll want to take special care when working with one-of-a-kind artwork. First and foremost, be sure to select an archival-quality document frame to protect and showcase your treasured document.
  • For proper spacing between the glass and the elevated artwork, ensure that when designing your frame that you opt for a deep profile moulding. These solid hardwood mouldings are part of our shadow box collection and include our Delta, Omega, and Southport Gold offerings.
  • Never use any kind of adhesive process such as spray mounting or dry mounting, because it will permanently alter the artwork and is not considered a proper conservation technique.
  • Always choose acid-free mounting materials and apply them correctly, so that the art will lay properly but retain the natural tendency of the artwork to expand and contract in response to changing environmental conditions.
  • When handling the art and mat boards, wear white gloves to prevent fingerprints or other damage.
  • Cutting mat board yourself is not recommended. At Church Hill Classics, our team of skilled artisans will cut the matting with clean lines and fine detailing.
  • For reasons of preservation, minimize the amount of adhesive you put in contact with the paper. And for the best lay-flat effect, avoid restraining the artwork’s natural tendency to “breathe” (to expand and contract as it absorbs and rejects moisture in the air) by taping it as little as possible. Therefore, you want to use only two tabs of tape (called a T-hinge, discussed later in this blog) to hold the artwork against its backing.
comic artwork framed and float mounted on wall

How to Float Artwork in Frame

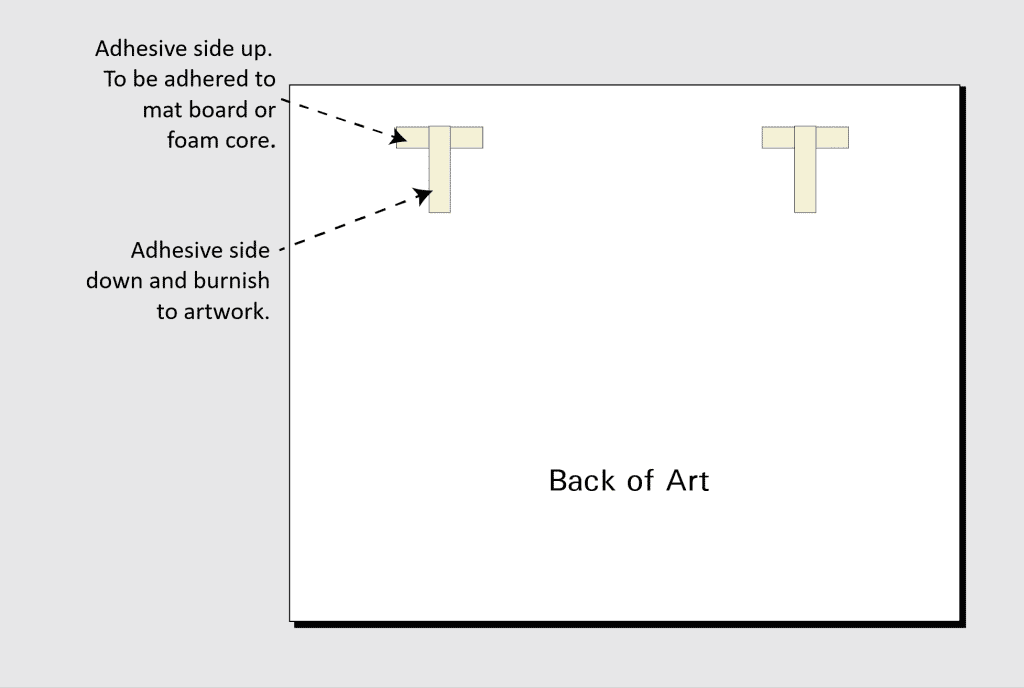
The whole point of float mounting is to make your artwork appear as though it’s magically floating above an uncut blank mat board. To ensure a perfect fit, you want to measure mat board to the size of your backing board. You may choose to attach your piece of art directly to the mat board with T-hinges. Or, to cast a more dramatic shadow with a float mount frame, first attach the art print to acid-free foam core so that the artwork sits a bit higher in the frame. However, just make sure the raised artwork is not pressing up against the frame’s glass. Over time, the document will stick to the glass, condensation will set in, and the paper fibers will break down and ruin the art.

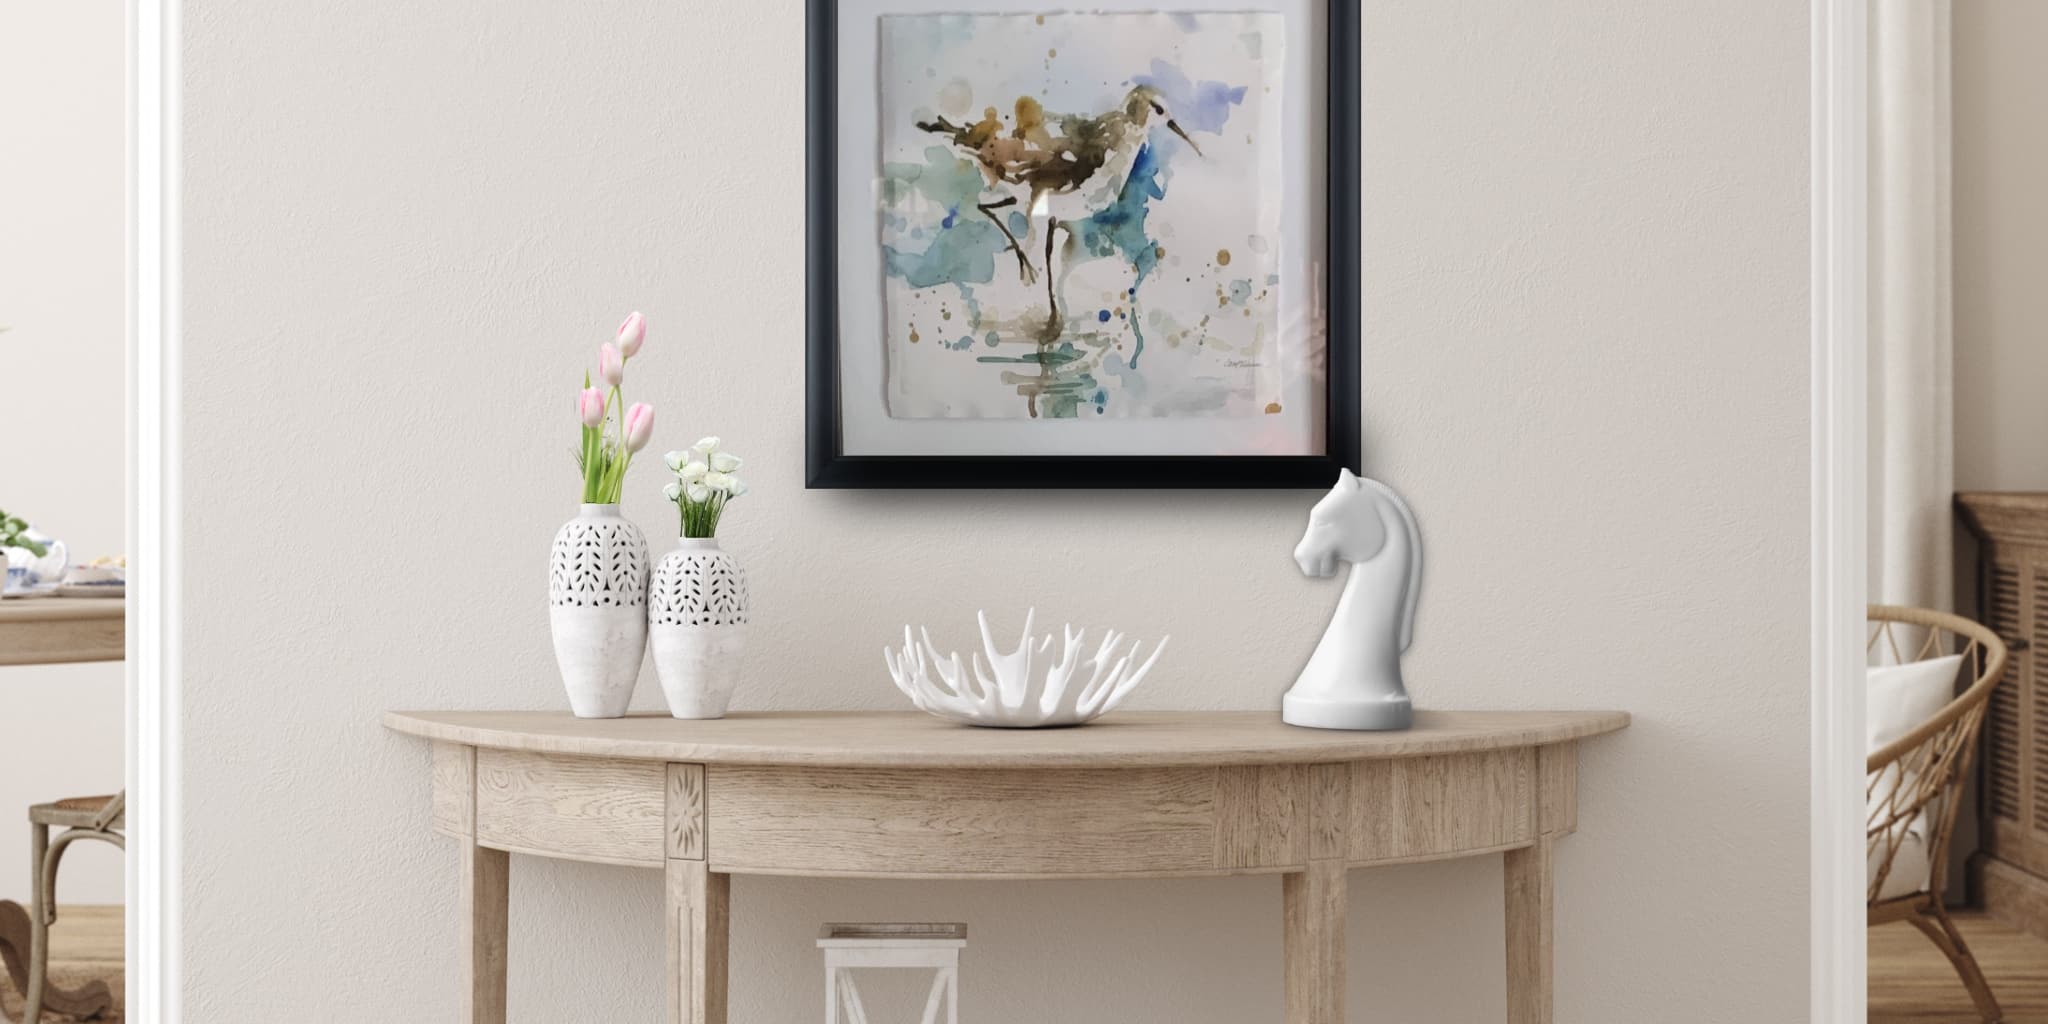
If you’re looking to showcase square artwork with a floating effect, be sure to check out our stylish shadow box frame, which is deeper than a standard picture frame and functions more like a display case for items that don’t lie flat. While you know you’ll need a premium picture frame that offers top-notch protection for your treasured artwork, you’ll first need to determine what size frame to buy.

Frame Your Artwork button
woman staring at float mount bull artwork

Hinge-Mount Your Artwork

When it comes to float framing, it’s recommended that you hinge-mount your artwork without permanently adhering it to the mat board. The hinges should be T-shaped and approximately 1½” to 1¾” wide. The T-hinge will allow the artwork to breathe in the float mount frame. Hinges should be removable with water or a small amount of alcohol. You should use a material with enough strength to hold your artwork in place, but it should also have the ability to pull free if the art is dropped. The reasoning behind this is that if the hinge happens to tear or fall off, it won’t tear your artwork as a result. The best and most common materials for this are rice paper hinges, linen tape, and some archival pressure-sensitive tapes.

Best Types of Tape for Float Mounting

Although Japanese rice paper is probably the best material to use, mostly because it’s made from traditional fibers that are known for their strength and pH neutrality, it’s not the most convenient to find and use. Pressure-sensitive tapes, which should be approximately 1½” to 1¾” wide, are easier to find and easier to apply. These archival tapes can usually be found in most art supply stores and are most commonly made by Filmoplast. Or alternatively, you may try Japanese hinging tape.

The advantage to these tapes is that you do not need water to apply them, so the paper will not ripple or wave. However, the disadvantage is that they don’t remove easily with water, especially over time (check this link for details on the Filmoplast removal process).

These tapes come in three weights, so determine which one is best suited for your art before purchasing. Also, when applied, the tape needs to be burnished to hold its strength. You can use a burnishing bone, the rounded side of a spoon, or any smooth-rounded tool that will not tear the hinge or the artwork.

T shape hinge hanging diagram

Steps for Using a T-Shaped Hinge

If you choose to use a T-Shaped hinge for your float mount frame, follow these steps:

1️⃣ Put your artwork facedown and measure 2¼” down from the top and approximately one-third of the way in on either side. Make a very light pencil mark at the locations for where the two hinges will go.

2️⃣ Make a T-hinge: Your vertical hinge is going to be adhesive side down, and your T top horizontal hinge will be adhesive side up (the part that will be adhered to the mat board).

3️⃣ Take your hinge and line up the top of the T to your pencil marks (vertical part, adhesive side down) and burnish it down to the back of your artwork.

4️⃣ After both sides have been adhered, you will mount it to the uncut mat board (or to the acid-free foam core, which will then be hinged to the mat board). Flip your art face up and center it lightly over the mat board, ensuring it’s centered exactly where you want it.

5️⃣ Once it’s in place, lower it onto the board and, using gloved hands, apply pressure to the top of your art where the hinges are. Ensure you apply enough pressure to make the tape secure.

6️⃣ Complete the presentation by showcasing the mounted work in a high-quality, custom frame. For long-term preservation of your artwork, be sure to select museum-quality, UV-filtering glass to protect from UV damage and risk of fading.

However you choose to float your artwork is up to you, the materials you have on hand, and how confident you are with each of the above-mentioned methods! But no matter how you choose to use a float mount frame, you can rest assured that these tips and tricks will allow you to hang it beautifully while showcasing and protecting your artwork for years to come.

Learn more about our custom frames (that you can use for float mounting) and other information on unique hanging methods for all your documents and artwork on our blog.

RELATED BLOGS YOU MAY ALSO LIKE:

Lucie Voves

Lucie Voves

Lucie Voves is the Founder and CEO of Church Hill Classics, a certified woman-owned manufacturing business and 12-time Inc. 5000 Award Winner.

Recommended Posts